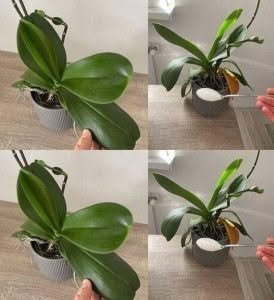

Have you ever looked at your beautiful orchid and wondered why it produces healthy green leaves but refuses to grow new flower spikes? You’re not alone! Many orchid lovers experience this frustrating problem. They water their plants, provide sunlight, and patiently wait, but the flowers simply don’t appear.
What if the secret to healthier orchids wasn’t an expensive fertilizer or complicated gardening routine?
There are simple ways to improve orchid care using the right nutrients, proper watering, and suitable growing conditions. One tablespoon of a suitable orchid fertilizer can help provide essential nutrients when used correctly.
But there’s something important to understand: no homemade fertilizer can guarantee continuous flowering. Orchids need the right combination of light, temperature, water, and nutrition.
Let’s discover how to encourage your orchids to produce beautiful flowers.
1. The One-Tablespoon Secret: Choose the Right Orchid Fertilizer
Orchids need essential nutrients to maintain healthy roots, leaves, and flower production.
A balanced, water-soluble orchid fertilizer can provide nutrients such as:
-
Nitrogen for healthy leaf growth.
-
Phosphorus for essential plant development.
-
Potassium for overall plant health.
-
Magnesium for chlorophyll production.
-
Micronutrients such as iron and manganese.
How to use it:
-
Choose a fertilizer specifically suitable for orchids.
-
Read the manufacturer’s dilution instructions.
-
Measure the recommended amount using a tablespoon or measuring spoon.
-
Mix it with the exact quantity of water specified on the label.
-
Apply the diluted solution to the growing medium.
-
Allow excess water to drain completely.
Important: One tablespoon is not a universal safe dose. Some concentrated fertilizers require much less. Never add a full tablespoon without checking the product instructions.
2. Why Your Orchid Produces Leaves but No Flowers
Sometimes an orchid looks perfectly healthy but refuses to bloom.
There are several possible reasons:
Insufficient light: Many common indoor orchids need bright, indirect light to develop flower spikes.
Incorrect temperature: Some orchids need a difference between daytime and nighttime temperatures to encourage flowering.
Excessive fertilizer: Too much fertilizer can damage roots and create salt buildup.
Incorrect watering: Constantly wet roots can develop rot, preventing healthy growth.
Immature plants: Young orchids may need time to reach flowering maturity.
Understanding the cause is much more effective than repeatedly adding fertilizer.
3. The Importance of Proper Watering
Watering is one of the most important parts of orchid care.
Many popular orchids, especially Phalaenopsis varieties, grow naturally as epiphytes. Their roots need both moisture and airflow.
Follow these tips:
-
Water when the growing medium is approaching dryness.
-
Use a pot with drainage holes.
-
Allow excess water to escape.
-
Avoid leaving roots sitting in standing water.
-
Never allow water to collect in the crown between the leaves.
If your orchid has silvery-looking roots, this can indicate that they are drying out, while healthy hydrated roots often appear greener.
4. Give Your Orchid the Right Light
Light plays a major role in flowering.
If your orchid receives too little light, it may continue producing leaves without developing flowers.
Try placing it near an east-facing window where it receives gentle morning sunlight.
If natural light is limited, a suitable plant grow light can help.
Avoid exposing delicate leaves to intense midday sunlight because this may cause sunburn.
5. Try the Ice Cube Watering Method? Think Again!
You may have seen advice recommending ice cubes for watering orchids.
Although this technique is popular online, orchids are tropical plants, and very cold water can stress their roots.
A better approach is to use room-temperature water and allow the growing medium to drain properly.
The goal is to provide adequate moisture without damaging the roots.
6. Remove Dead Roots and Maintain Healthy Growing Medium
Orchid roots need air circulation.
Over time, bark-based growing media can break down and retain too much moisture.
Check your orchid regularly for:
-
Soft, mushy roots.
-
Brown or black damaged roots.
-
Unpleasant smells from the growing medium.
-
Excessively decomposed bark.
Healthy roots are generally firm, while damaged roots may feel soft and hollow.
If necessary, repot the orchid using a suitable orchid bark mixture.
Never remove healthy roots simply because they look different from ordinary garden plant roots.
7. The Banana Peel Fertilizer Myth
Another popular gardening suggestion involves soaking banana peels in water and using the liquid on orchids.
Banana peels contain minerals, including potassium, but homemade banana-peel water has unpredictable nutrient concentrations.
It is not a reliable replacement for a properly formulated orchid fertilizer.
It may also encourage unpleasant odors, microbial growth, or unwanted insects.
For consistent results, choose a fertilizer designed for orchids.
8. How to Encourage Your Orchid to Bloom Again
If you want your orchid to produce another flower spike, focus on these simple habits:
-
Provide bright, indirect light.
-
Maintain suitable temperatures.
-
Water according to root and growing-medium conditions.
-
Use diluted orchid fertilizer as directed.
-
Maintain good air circulation.
-
Avoid disturbing healthy roots.
-
Be patient during the natural resting period.
For many Phalaenopsis orchids, a modest nighttime temperature drop can help trigger a new flower spike.
However, flowering requirements vary among orchid species.
9. Mistakes That Can Prevent Orchid Flowering
Avoid these common mistakes:
-
Using excessive fertilizer.
-
Keeping roots constantly wet.
-
Placing orchids in direct, harsh sunlight.
-
Using ordinary garden soil instead of suitable orchid media.
-
Allowing water to collect in the crown.
-
Moving the plant repeatedly.
-
Expecting flowers immediately after fertilizing.
Remember that healthy roots and leaves are the foundation of beautiful blooms.
10. How Long Does It Take for an Orchid to Bloom?
Orchids do not respond instantly to fertilizer.
Depending on the species, maturity, and growing conditions, developing a new flower spike can take several weeks or longer.
Once a flower spike develops, additional time is needed for the buds to mature.
Some Phalaenopsis orchids can keep their flowers for several months under favorable conditions.
With consistent care, your orchid may reward you with another beautiful display.
Final Thoughts: The Real Secret to Beautiful Orchids
You don’t need expensive gardening products or mysterious kitchen ingredients to encourage healthy orchid growth.
The real secret is providing the right nutrients in the correct concentration while maintaining proper light, watering, temperature, and airflow.
A tablespoon of suitable orchid fertilizer, when diluted according to its label, can be part of a healthy feeding routine.
But remember: More fertilizer doesn’t mean more flowers. Healthy roots, balanced nutrition, and patience are what help orchids thrive.
Treat your orchid with care, give it the conditions it needs, and enjoy the beautiful flowers when the time is right!